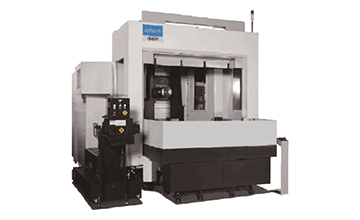
HN 63 E Ti
HMC(4AX) Table(BX) Column(Z) Spindle-head(Y)
| Category | Item | Specification |
| Workpiece | Workpiece diameter[mm] | 1080 |
| Workpiece length[mm] | 1000 |
| Travels | Stroke X[mm] | 1080  |
| Stroke Y[mm] | 930  |
| Stroke Z[mm] | 830  |
| Rapid traverse(X)[m/min] | 30 |
| Rapid traverse(Y)[m/min] | 30 |
| Rapid traverse(Z)[m/min] | 30 |
| Table | Workpiece allowable Load[kg] | 1200 |
| Table Size[mm] | 630×630 |
| Category | Origin | Japan |
Milling spindle 1(H1)
| Spindle name | | | | | | | | Taper | 7:24 taper No. 50 | | | | | | | Rotational speed[rpm] | 6000 | | | | | | | Power[kW] | | | | | | | | Torque[Nm] | 901 | | | | | | | Transmission | | | | | | | |
Tool Magazine 1
| Tool holder taper | 7:24 taper No. 50
| | | | | | | No. of tool storage[ea] | 62
88
128
| | | | | | | Tool diameter[mm] | | | | | | | | Tool length[mm] | | | | | | | | Tool weight[kg] | | | | | | | | Tool change time(TTT)[s] | | | | | | | | Tool change time(CTC)[s] | | | | | | | |
*A: Max. tool diameter (with adjacent tools), B: Max. tool diameter (without adjacent tools)
Guide way
| Axis | X | Y | Z |
| Guide way | Box way | Box way | Box way |
| Qty | 2 | 2 | 2 |
Photo gallery

| Model | Table Size | Workpiece diameter | Workpiece length | Origin |
HN 63 E Ti
Table[B] 1 Milling spindle Pallet changer | 630×630 | 1080 | 1000 | Japan |
HN 80 D II Ti
Table[B] 1 Milling spindle Pallet changer | 800×800 | 1750 | 1400 | Japan |
HN 800 V
Table[B] 1 Milling spindle Pallet changer | 800×800 | 1750 | 1400 | Japan |
HN 800 V BAR
Table[B] Boring sleeve[W] 1 Milling spindle Pallet changer | 800×800 | 1750 | 1400 | Japan |
 MACHINE SPECIFICATIONS
Not responsible for misprints or data errors. Actual product appearance may differ.
